
Как сшить кермита
Обновлено: 26.04.2024
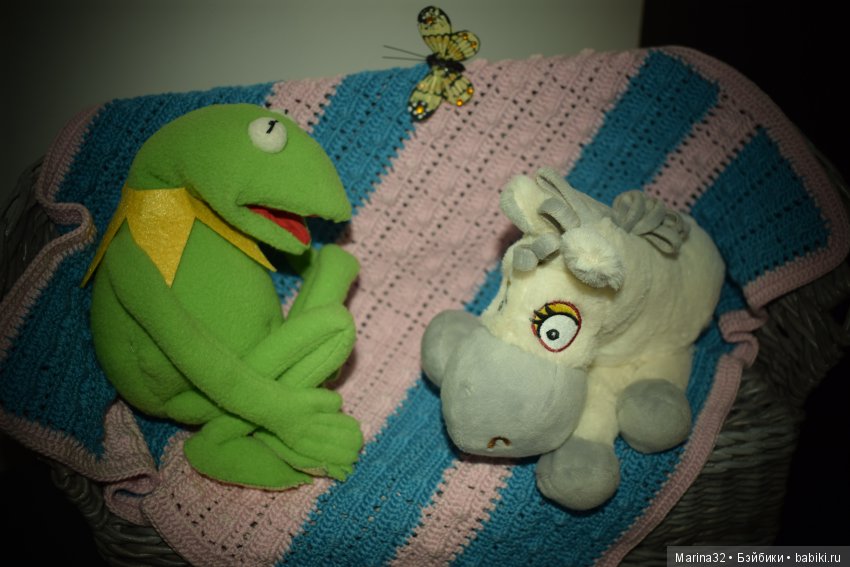
Лягушонок Кермит Казалось бы, совсем на вид не сложный персонаж, делали мы его аж вдвоём: начинала Лариса Захарова, а заканчивала я (Екатерина Рыбаченко). В итоге получился лягушонок хоть куда)) Подробности подписаны под фотографиями.
У Ларисы возникли проблемы при изготовлении с его головой и тонкостью конечностей, и она передала его мне. и долго-долго мучаясь он в итоге получился)
Глаза только пришлось ему сделать из фетра, а с самого начала Лариса делала из полимерной глины, но они не подходили к его новой голове,и теперь просто лежат в шкатулке с другими глазками. (такая у меня есть шкатулка глаз. )
В принципе, если постараться, то он может стоять. Н всё же, что-нибудь должно его подпирать хоть с какой-то стороны)
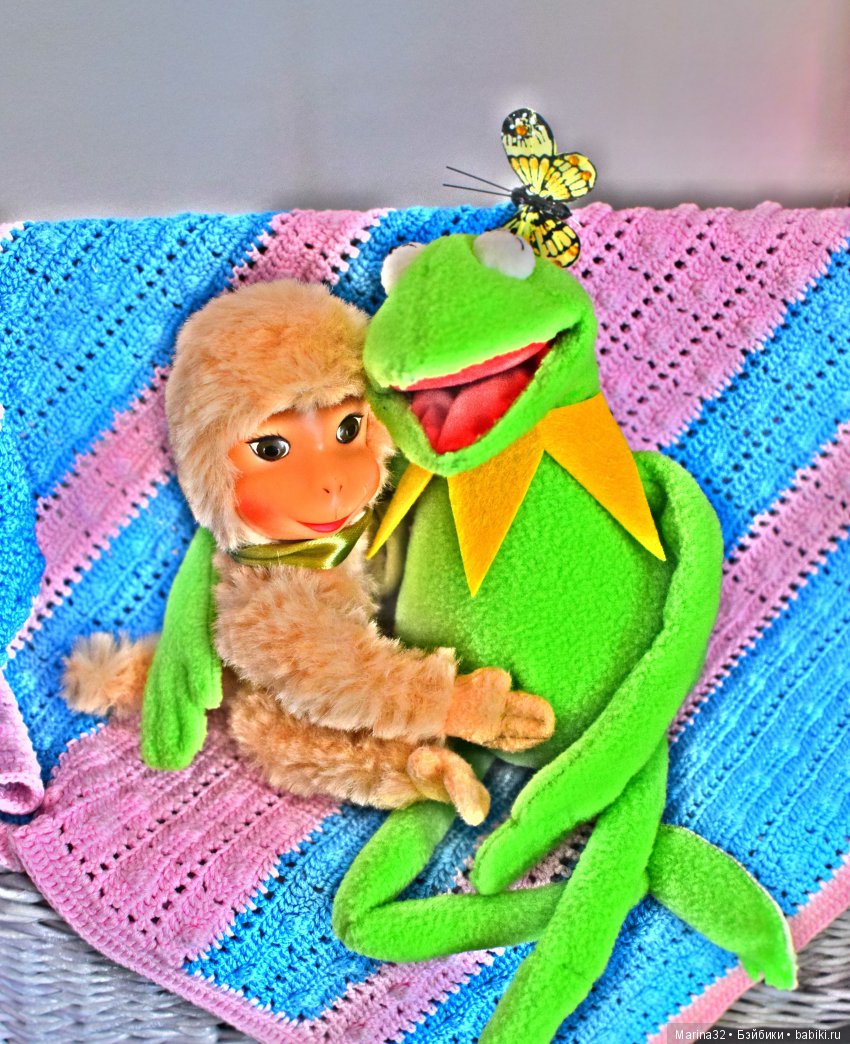
Один человек хотел заказать такую же игрушку, но у него было к нам страшное недоверие. и он просил: "если это действительно ваша игрушка, то сфотографируйте его так, что бы он одной рукой закрывал глаз". Вот так получилась эта фотография.
Вид сзади. Для того. что бы на морде спереди швов было поменьше, пришлось ему сделать сзади швов побольше.

Клуб PrettyToys запись закреплена
Просто Лягушонок Кермит от Татьяны Браженковой.

«Не маппет, без каркаса, с закрытым ртом. Простой, как сибирский валенок Шутка, все эти „простые“ с виду игрушки порой шьются очень не просто. Его шила быстро-срочно. Поэтому без наворотов. Это такой вариант лягушки-обнимашки, весь мягонький, с болтающимися конечностями.»

Из х/б велюра, и менно этот зелёный велюр ведёт в сторону
Рост стоя — 29 см. Но сам не стоит.
After quite some time experimenting and practicing, I went ahead and made a puppet replica of Kermit the Frog; something that I've wanted to do for years, but wasn't sure if I would be able to do.
Materials: Dyed "Antron" type fleece from Etsy, dyed felt, Ultrasuede, armature wire (for the fingers), ping pong ball spraypainted white and halved for the eyes, black "velvet" adhesive for the pupils, contact cement for gluing parts for the hands, feet, and mouth plate, foam for the body, and stuffing for the limbs.
Patterns: The pattern for the head was a slightly modified version of one that was discussed in a thread here on RPF years ago. It seemed like a pretty good pattern to start with. The patterns for the arms,legs, and feet were slightly modified from the Master Replicas photo puppet. Hands were made separately and then attached to the arms for maximum articulation.
First thing was to practice the "Henson" stitch, which turned out surprisingly easy to pick up, even though I have minimal experience with sewing. I simply found on YouTube several great tutorials. The fleece is also very forgiving and stretchy, so the seams can be hidden quite well with a little bit of fluffing with the needleafterward.
Next was building up the body. Here's a pic of it in its early rough shape. (sitting over my MR replica ). For some reason it looks huge in this pic. It's mostly camera distortion. The puppet is indeed larger than the MR photo puppet, but not THAT much larger.
Next was getting the fabric to fit over the body, which took a lot of stretching, trimming, sewing in the seams, to get it to look right.
The hands are simply made from small pieces of thin cardstock with wires epoxied onto it. The paper you see underneath is a pattern I drew up to use as a sizing guide. The palm was partially sewn on, and bit of stuffing added. Finger fabric was glued with contact cement. One thing of note is that all of the "joints" in his arms and legs have been left without stuffing, to ensure maximum pose-ability. It's something that occurs on the original puppets that i wanted to replicate.
Working on a leg and foot
Messing around with limbs:
I ended up dyeing the felt slightly darker as the stock I found was too light
"Who am I?!" Here's a pic of the head already stitched onto the body, but the arms pinned in place. It was very important to utilize the pins during sewing to keep things from shifting around:
In progress but getting there!
And below is pretty much the almost finished piece. Just need to stitch on the collar and attach the eyes, which I'll probably do via velcro so that I can easily remove them. Keep in mind this is a puppet, so the head is not filled with anything. I've added some stuffing for the pictures, as well as a tall cup that is holding his head up. I'll be building some sort of armature inside for display purposes since I don't really plan on using it as a puppet anyway. I have yet to add the holes in the hands for the hand rods but will do that at a later date.
Kermit has always been a favorite of mine, so this was one amazing experience! Probably the most fun prop building project I've ever attempted. Took just a little over a month on this piece, not counting the week or so spent experimenting and practice stitching.
Version 3 Kermit; the final one I made. Inspired by the earlier Kermit look:
jedilos
Well-Known Member
Sent from my SM-G955U using Tapatalk
MooCriket
Master Member
Looks better than the original!
Sr Member
Wow that's awesome I want one
Sent from my iPhone using Tapatalk
squidsicle
Active Member
Well done!
I'm still upset I missed out on the Master Replicas Kermit Photo Puppet.
He looks Wonderful!
Angelus Lupus
Sr Member
Great work! The posed pictures really capture the character.
(also, beautiful sword, btw)
Sam Lowry
Active Member
That's pretty damn cool! I always wanted a Kermit.
Sr Member
Thanks for all the comments! Much appreciated. It's been awhile since I've had so much fun making something so I'm glad to share the experience. I'd have to say, puppet making is kind of addicting. I've begun to think of what other characters i might attempt to make next. Nothing for sure yet though.
The Master Replicas Kermit is really cool. I jumped on it the second it was released years ago, as there really weren't any options to buy full scale Muppet replicas. He has his inaccuracies, but it's a neat piece. It's still disappointing to me that the license was passed onto the dreadful efx after Master Replicas went away. meaning we'll never see any new product.
As for the sword, I only have three swords in my collection (all customs). This one was made by Scott Roush (bladesmith in Wisconsin. He makes some really neat knives as well). I always have to sneak one in a picture whenever the chance arises haha!
The Game Guru
New Member
Awesome work, can't take my eyes off of it. It you told me this was an original Kermit, i most certainly would have believed you.
Strikerkc
Sr Member
Always fun to see great stuff like this, that I just wasn't expecting when I logged in. A++
jcgardea
Active Member
Custom Kermit the Frog puppet replica!!
Sent from my iPhone using Tapatalk
LTsmash1200
Sr Member
This is phenomenal! I've wanted a Kermit forever.
Apollo
Legendary Member
It's not easy being green, Nice job
Sr Member
Thanks again for all the comments! After looking at a bunch of photo references of the originals, I'd noticed there are so many versions of him, so I did my best to draw influence from several of my favorite ones.
Sent from my iPhone using Tapatalk
Wow thanks for linking that video! It's fantastic! Really glad to see their build process and the materials used. That's also the first i've heard of the boning strips for making the foam structure more solid. I will have to look into that.
matty matt
Sr Member
Amazing! I love it.
DarkHelmet
Master Member
I attempted Kermit about four years ago. Used Anton fleece (wonderful stuff). Got as far as the head and put it aside. You did good.
Moviefreak
Master Member
Simply stunning and professional work. Fantastic! :thumbsup
Sr Member
Thanks very much!
Well, I have extra fabric leftover, enough to make one more. so that's what I've decided to do. I'm making some small adjustments to this second one, mostly going to make his body thinner and slightly taller, which the earlier versions of kermit seem to exhibit. I'll post a comparison when I eventually finish the second Kermit.
Made the arms today. Much faster at this the second time around!
Freaky Kermit! (No I didn't actually attach an extra set of arms on him haha! Just messing around.)
LTsmash1200
Sr Member
This has me seriously considering trying to make one of my own, but I haven't done any sewing since middle school. and I wasn't very good at it. I just watched a few videos on the Henson stitch, it seems pretty easy. Were there any other tutorials or references or anything that you used?
Sr Member
This has me seriously considering trying to make one of my own, but I haven't done any sewing since middle school. and I wasn't very good at it. I just watched a few videos on the Henson stitch, it seems pretty easy. Were there any other tutorials or references or anything that you used?
I'd say it's definitely worth a shot! The only references that I really used were the photos I'd gathered from all around the internet. For sizing, I pretty much estimated by using the eyes as reference, since the original apparently started with 40mm ping pong balls. After finding some good references that served as a size guide, I printed out an approximate 1:1 scale of kermit so that I had something to compare to. But the most important thing is to get the proportions right, so even if the size isn't 100% the same as the original, he'll just look just fine. Regardless, it appears the real Kermit has undergone some major variations and changes over the decades anyways!
When I get back home tonight, I will post the patterns I used on mine. I could also write down a few "tips" that I learned during the process. I don't mind sharing them (unlike the people over on the muppet central forum, which I can't even post in despite having an account!) I'd just recommend practicing the stitch on some scrap pieces of fabric. I also don't have much stitching experience, but luckily the Henson stitch with the "antron" fabric is very forgiving! I just went slowly and tried to be patient with it.
I'm in Seattle, so luckily there's currently a Jim Henson exhibit at the MoPop museum. There's a Kermit on display there, but I'm pretty sure it's a "photo puppet" as it's surprisingly small. Also, I saw no evidence of a hole on the bottom for performing the puppet. But still, I was able to spot some really important details (some pics of it in the album below). A lot of the puppets had some roughness to them as well, either from aging or just the way they were put together! So I wouldn't worry about "perfecting" the stitch either.
If anyone uses Google Photos, below is a link to an album of saved photo references that I've collected from all over the internet.
Девочки, кому нужна выкройка, пишите, пожалуйста, в личку.


Да здравствует Скала Фрэглов. В детстве очень любила это шоу кукольное. Вот, Кермит дома у меня живет теперь)))
мк или выкройкой не поделитесь?
Поделюсь с удовольствием выкройкой)) МК у меня пока нет ни одного. Выложу выкройку завтра, сегодня приду с работы очень поздно - не смогу Спасибо за проявленный интерес к моему лягуху
спасибо , буду ждать
Анечка, я выложила выкройку лягуха. Распечатайте на А4, и вперёд. Удачи Вам
Недели две назад получила письмо в личку с просьбой сшить лягушонка Кермита. Почему я?! — первое, что пришло на ум прочитав письмо. Я же не шью игрушки такого формата… Но отказываться не стала, интересно же-вдруг пошью шедевр
Начались бесконечные поиски картинок лягушонка. Нет, я конечно же помнила как он выглядит, ведь в детстве многие смотрели сериал с Термитом — верно?! Память освежили, нужно и выкройку сделать/найти на просторах интернета. С выкройкой сложнее — ее нигде нет, даже примерного намека…
Дня через два нашлась выкройка на каком-то иностранном ресурсе. Здорово! — подумала я листая текст на английском языке… Не то чтобы я кроме русского языка больше никакой не знаю — знаю, и немецкий и латыньно вот английский…
Выкройки не все были понятны, что — откуда — и куда вот так белиберда… С одеждой проще, рукавчики нужной длинны и платья до колен. Но лягушка — у него же лапы длинные и как соблюсти параметры.
С горем пополам выстрадала выкройку, выкроила и начала шить. Голова и тело — супер. Лапы — фу! Они ну очень длинные. В процессе шитья все время что-то исправляла, подгоняла, переделывала… И так три дня…
Наконец-то лягух «родился»! Ура-ура! Симпатичные такой, ладненький — не без изъяна конечно
Пишу заказчику, мол, готов заказ и фото обязательно прилагаю. Ответное письмо ждала два дня и все время переживала почему же молчат. Оказалось все просто — лягушонок, по мнению заказчика, не идеален! Мне даже не дали возможности ответить, вышли из переписки и заблокировали. А за что?! Мне до сих пор не ясно…
Вот скажите — ну разве есть что-то в этом мире идеальное?! Мы — не идеальные. Даже самый идеальный торт для кого-то будет не идеальным — слишком сладкий, не яркий, мало фруктов, много крема. И вообще я не торт хотел, а пирожное!
Кермит печален — он не идеален… Не любим и не желанен… Может и так! Но шила его с любовью, вкладывая душу… И пусть он для кого-то не идеален, для меня он — лучший.


Все добра! Спасибо за внимание!
Смотрите игрушки ручной работы наших мастеров на Бэйбиках
Читайте также: