
Как связать radio input
Обновлено: 19.04.2024
What's the best way to use in HTML?
I'm looking for HTML that's semantically good, whose formatting is configurable via CSS.
I want to be able to style/render it to look something like:
Thinking of the CSS, I think that I'd like the labels on the left (e.g. "Car" and "Bus") to be in some kind of text-align: right block?
I don't know about the radio buttons on the right: in some kind of perhaps, with "display: inline-block" ? Or "white-space: pre" ?
What kind of block-level tags (e.g.
or ) and/or other tags (e.g. or
) would you recommend?
Edit:
How about the following.
HTML uses , like HTML is supposed to and as recommended in the alistapart article:
To make it easer for Firefox to access/position the contents of the , place it within a :
Then, use the browser-specific CSS described in Legends of Style Revised to position the contents of the span to left of the fieldset.
Does the CSS really have to be so complicated and browser-specific? What's the simplest CSS which ought theoretically to work, instead of the more-complicated CSS required to actually work with those imperfect browsers? If is hard to position then what's a good (semantic) alternative?
Атрибут type тега со значением radio обычно используется для создания группы радиокнопок (переключателей), описывающих набор взаимосвязанных параметров. Одновременно пользователь может выбрать лишь одну радиокнопку из предложенных. Радиокнопки обычно отображаются как небольшие кружки, которые заполняются или подсвечиваются при наведении.
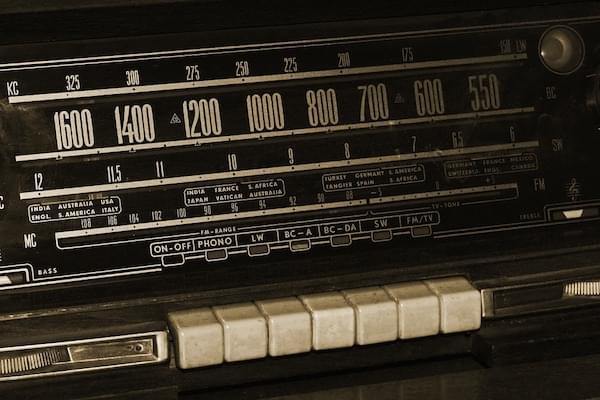
Радиокнопки называются так потому, что выглядят и функционируют в схожей манере с кнопками старомодных радиоприёмников, подобных представленному ниже.

Примечание: Чекбоксы похожи на радиокнопки, но с одним важным отличием: радиокнопки предназначены для выбора одного значения из предложенных, в то время как чекбоксы позволяют "включать" и "выключать" значения. Если существует несколько элементов управления, то с помощью радиокнопок пользователь сможет выбрать лишь один из них, а чекбоксы позволят выбрать несколько значений одновременно.
| Value | Строка DOM отображающая значение радиокнопки |
| События | change (en-US) и input (en-US) |
| Универсальные атрибуты | checked |
| Атрибуты IDL | checked и value |
| Методы | select() (en-US) |
Атрибут value
Атрибут value - это строка DOM , содержащая значение радиокнопки. Это значение никогда не показывается пользователю его веб-браузером. Атрибут value используется для того, чтобы точно определить какая из радиокнопок была выбрана пользователем.
Создание группы радиокнопок
Группа радиокнопок определяется путём присвоения каждой радиокнопке в данной группе одного и того же значения атрибута ( name ). Выбор любой радиокнопки в этой группе автоматически отменяет выбор другой радиокнопки в той же группе.
Вы можете создать любое количество групп радиокнопок, если каждой из этих групп будет присвоено своё уникальное значение атрибута name .
Например, если в вашей форме необходимо запросить предпочитаемый способ контакта с пользователем, то вы можете создать три радиокнопки с name= "contact" , но с разными value = "email" , value = "phone" и value = "mail" соответственно. Пользователь не видит атрибуты name и value (если только вы не добавляете код для их отображения).
HTML будет выглядеть следующим образом:
Здесь вы видите три радиокнопки, каждая из которых имеет атрибут name со значением "contact" и уникальный атрибут value , который однозначно идентифицирует эту радиокнопку в данной группе. Каждой радиокнопке присвоен уникальный id , связанный с тегом через атрибут for для установления связи между конкретной меткой и конкретной радиокнопкой.
Вы можете опробовать этот код здесь:
Представление данных группы радиокнопок
Когда представленная выше форма отправляется на сервер с информацией о выбранной радиокнопке, то её данные включают запись в виде "contact=name". Например, если пользователь кликает на радиокнопку "Phone", а затем отправляет форму на сервер, данные формы будут включать в себя строку "contact=phone" .
Если вы пренебрежёте атрибутом value в вашем HTML, то отправленные данные просто присвоят данной группе значение "on" . То есть, если пользователь кликнет на радиокнопку "Phone" и отправит форму, итоговые данные отобразятся как "contact=on" и будут абсолютно бесполезны. Поэтому никогда не забывайте указывать атрибут value !
Примечание: Если в отправленной форме не была выбрана ни одна радиокнопка, то группа радиокнопок вообще не будет включать в себя никакие данные, так как отсутствуют значения для отправки.
Поскольку отправлять пустую форму в большинстве случаев не имеет никакого смысла, то разумно оставлять одну радиокнопку активированной по умолчанию с помощью атрибута "checked" . Смотрите здесь Selecting a radio button by default.
Давайте добавим немного кода в наш пример для того, чтобы изучить данные, полученные из этой формы. HTML изменяется путём добавления блока для вывода данных формы.
Опробуйте этот пример и убедитесь, что для группы радиокнопок "contact" будет только один результат.
Использование радиокнопок
Мы уже осветили основные моменты работы с радиокнопками выше. Давайте рассмотрим другие распространённые функции и методы, связанные с использованием радиокнопок, о которых вам нужно знать.
Выбор радиокнопки по умолчанию
Чтобы установить радиокнопку как выбранную по умолчанию, вам необходимо подключить атрибут checked , как показано ниже в немного изменённой версии предыдущего примера.
В данном случае первая радиокнопка будет выбрана по умолчанию.
Примечание: Если вы устанавливаете атрибут checked более чем на одну кнопку, то стоит иметь в виду, что каждый последующий атрибут checked отменяет предыдущий, то есть как отмеченная будет выбрана последняя радиокнопка с атрибутом checked . Это происходит потому, что в каждой группе радиокнопок одновременно может быть выбрана только одна кнопка, и браузер автоматически отменяет другие выбранные до этого радиокнопки.
Providing a bigger hit area for your radio buttons
Валидация формы
Радиокнопки не участвуют в проверке ограничений, так как у них нет реальных значений для ограничения.
Установка стилей радиокнопок
Следующий пример отображает немного более проработанную версию примера, который мы использовали на протяжении всей статьи, с некоторыми дополнительными стилями и с лучшей семантикой, установленной с помощью специализированных элементов.
HTML будет выглядеть следующим образом:
CSS будет выглядеть так:
Самым примечательным здесь является использование свойства appearance с использованием префиксов некоторых браузеров. По умолчанию радиокнопки (и чекбоксы) уже имеют собственные стили в каждой операционной системе. Придав свойству appearance значение none , вы можете отменить все "родные" настройки стилей операционной системы и создать свои собственные. Здесь мы использовали свойства border и border-radius , а также свойство transition для создания хорошо анимированного выбора радиокнопок. Заметьте также, что псевдокласс :checked используется для указания стилей внешнего вида кнопок при их выборе.
Стоит иметь в виду, что свойство appearance неплохо работает для создания простых стилей, но имеет тенденцию вести себя несколько непоследовательно в некоторых браузерах и полностью не работает в Internet Explorer. Тщательно проверяйте как работает ваш сайт в каждом браузере!
Обратите внимание, что при клике на радиокнопку, на предыдущей выбранной кнопке появляется мягкий эффект угасания. Кроме того, стиль и окраска легенды и кнопки "Submit" имеет сильный контраст с остальным текстом. Возможно, это не совсем тот эффект, который вы хотели бы видеть в своём реальном веб-приложении, но этот пример хорошо отображает возможности CSS.
Only one radio button in a given group can be selected at the same time. Radio buttons are typically rendered as small circles, which are filled or highlighted when selected.
Try it
They are called radio buttons because they look and operate in a similar manner to the push buttons on old-fashioned radios, such as the one shown below.
Note: Checkboxes are similar to radio buttons, but with an important distinction: radio buttons are designed for selecting one value out of a set, whereas checkboxes let you turn individual values on and off. Where multiple controls exist, radio buttons allow one to be selected out of them all, whereas checkboxes allow multiple values to be selected.
Value
The value attribute is a string containing the radio button's value. The value is never shown to the user by their user agent. Instead, it's used to identify which radio button in a group is selected.
Defining a radio group
A radio group is defined by giving each of radio buttons in the group the same name . Once a radio group is established, selecting any radio button in that group automatically deselects any currently-selected radio button in the same group.
You can have as many radio groups on a page as you like, as long as each has its own unique name .
For example, if your form needs to ask the user for their preferred contact method, you might create three radio buttons, each with the name property set to contact but one with the value email , one with the value phone , and one with the value mail . The user never sees the value or the name (unless you expressly add code to display it).
The resulting HTML looks like this:
Here you see the three radio buttons, each with the name set to contact and each with a unique value that uniquely identifies that individual radio button within the group. They each also have a unique id , which is used by the element's for attribute to associate the labels with the radio buttons.
Data representation of a radio group
When the above form is submitted with a radio button selected, the form's data includes an entry in the form contact=value . For example, if the user clicks on the "Phone" radio button then submits the form, the form's data will include the line contact=phone .
If you omit the value attribute in the HTML, the submitted form data assigns the value on to the group. In this scenario, if the user clicked on the "Phone" option and submitted the form, the resulting form data would be contact=on , which isn't helpful. So don't forget to set your value attributes!
Note: If no radio button is selected when the form is submitted, the radio group is not included in the submitted form data at all, since there is no value to report.
It's fairly uncommon to actually want to allow the form to be submitted without any of the radio buttons in a group selected, so it is usually wise to have one default to the checked state. See Selecting a radio button by default below.
Let's add a little bit of code to our example so we can examine the data generated by this form. The HTML is revised to add a block to output the form data into:
Then we add some JavaScript to set up an event listener on the submit event, which is sent when the user clicks the "Submit" button:
Try this example out and see how there's never more than one result for the contact group.
Additional attributes
In addition to the common attributes shared by all elements, radio inputs support the following attributes.
A Boolean attribute which, if present, indicates that this radio button is the default selected one in the group.
Unlike other browsers, Firefox by default persists the dynamic checked state of an across page loads. Use the autocomplete attribute to control this feature.
Using radio inputs
We already covered the fundamentals of radio buttons above. Let's now look at the other common radio-button-related features and techniques you may need to know about.
Selecting a radio button by default
To make a radio button selected by default, you include checked attribute, as shown in this revised version of the previous example:
In this case, the first radio button is now selected by default.
Note: If you put the checked attribute on more than one radio button, later instances will override earlier ones; that is, the last checked radio button will be the one that is selected. This is because only one radio button in a group can ever be selected at once, and the user agent automatically deselects others each time a new one is marked as checked.
Providing a bigger hit area for your radio buttons
Beyond accessibility, this is another good reason to properly set up elements on your forms.
Validation
Radio buttons don't participate in constraint validation; they have no real value to be constrained.
Styling radio inputs
The following example shows a slightly more thorough version of the example we've seen throughout the article, with some additional styling, and with better semantics established through use of specialized elements. The HTML looks like this:
The CSS involved is a bit more significant:
Most notable here is the use of the appearance property (with prefixes needed to support some browsers). By default, radio buttons (and checkboxes) are styled with the operating system's native styles for those controls. By specifying appearance: none , you can remove the native styling altogether, and create your own styles for them. Here we've used a border along with border-radius and a transition to create a nice animating radio selection. Notice also how the :checked pseudo-class is used to specify the styles for the radio button's appearance when selected.
Note: If you wish to use the appearance property, you should test it very carefully. Although it is supported in most modern browsers, its implementation varies widely. In older browsers, even the keyword none does not have the same effect across different browsers, and some do not support it at all. The differences are smaller in the newest browsers.
Notice that when clicking on a radio button, there's a nice, smooth fade out/in effect as the two buttons change state. In addition, the style and coloring of the legend and submit button are customized to have strong contrast. This might not be a look you'd want in a real web application, but it definitely shows off the possibilities.
I am trying to associate a radio input with a specified text input. As you can see in the picture, there are two options. I know I can use for="" to associate the label to the radio input, but how can I also associate it to the text input underneath, and vise versa so when I focus on the text input, if focuses the correct radio button?

NOTE: The amount entered will be inserted into the database, so that's the most important part of this form. Currently if I click on $Off, I can still enter a number in %Off. I don't want this to happen, so the user does not get confused.
5 Answers 5
You can't use a single element to label two separate inputs. I would suggest associating the labels to the radio buttons, since the radio button is such a small click target and the label expands that target.
Choose one of the radios to be selected by default, perhaps "$ Off". Disable the other text field by default:
Then use jQuery to do something like this:
Basically, this listens for click events on both radio buttons. When you click one radio, it enables its associated text field (i.e., the text field with a CSS class name matching the value of the radio button) and disables the other text field. That way, you can't enter text into either text field unless its associated radio button is checked.
Переключатели (жарг. радиокнопки) используют, когда необходимо выбрать один единственный вариант из нескольких предложенных. Создаются следующим образом.
Атрибуты переключателей перечислены в табл. 1.
| Атрибут | Описание |
|---|---|
| name | Имя группы переключателей для идентификации поля. Поскольку переключатели являются групповыми элементами, то имя у всех элементов группы должно быть одинаковым. |
| disabled | Блокирует переключатель для выбора. |
| form | Идентификатор формы для связывания кнопки с элементом . |
| type | Для переключателя значение должно быть radio . |
| checked | Предварительное выделение переключателя. По определению, набор переключателей может иметь только один выделенный пункт, поэтому добавление checked сразу к нескольким полям не даст особого результата. В любом случае, будет отмечен элемент, находящийся в коде HTML последним. |
| value | Задаёт, какой текст будет отправлен на сервер. Здесь уже каждый элемент должен иметь свое уникальное значение, чтобы можно было идентифицировать, какой пункт был выбран пользователем. |
| autofocus | Переключатель получает фокус после загрузки документа. |
| required | Выбор переключателя перед отправкой формы становится обязательным. |
Как обычно, переключатели нельзя вкладывать внутрь ссылок и кнопок.
Создание группы переключателей показано в примере 1.
Пример 1. Создание переключателей
В результате получим следующее (рис. 1).

Рис. 1. Вид переключателей в браузере
Заметьте, что в данном примере значение атрибута name для всех переключателей одинаково, именно в таком случае браузер понимает, что переключатели связаны между собой и помечает только один пункт из предложенных. Значение атрибута value же должно различаться, чтобы обработчик формы мог понять, какой вариант выбран пользователем.
Читайте также: